Guides · Social
Preparing photos for Instagram: sizes, cropping and quality
Upload them at the right size and shape, and you decide the crop instead of Instagram. Sizes, ratios and a quick workflow.
Short answer. Upload photos 1080 pixels wide, already cropped to the shape of the post: 1080 × 1350 (4:5 portrait, the one that takes the most space in the feed), 1080 × 1080 square, or 1080 × 1920 for Stories and Reels. JPEG at quality 85–90, sRGB colours.
Instagram accepts almost anything, then decides by itself how to crop and compress it. The result is often softer or cut where you didn’t want. Preparing the photos at the right size and shape before uploading gives you back control: you choose the crop, and Instagram has less to recompress.
The sizes that work
| Format | Ratio | Pixels |
|---|---|---|
| Portrait post | 4:5 | 1080 × 1350 |
| Square post | 1:1 | 1080 × 1080 |
| Landscape post | 1.91:1 | 1080 × 566 |
| Stories and Reels | 9:16 | 1080 × 1920 |
Instagram shows images at most 1080 pixels wide: a 6000-pixel photo doesn’t look sharper, it just gets reduced by Instagram instead of by you. Instagram changes its layouts from time to time, so check the current formats if something looks different.
Why 4:5 is often the best choice
On a phone the feed is vertical. A 4:5 photo occupies about a quarter more of the screen than a square one, and much more than a landscape one: more space, more attention. Most photos taken in 3:2 or 4:3 can be cropped to 4:5 by losing only a little at the sides.
Crop yourself, around what matters
When you crop a landscape photo to 4:5, something is lost on the sides. The question is what. A face on the left, a subject off-centre: an automatic crop from the centre can cut them out. Choose the anchor point yourself, so the subject stays in the frame.
Carousels: all the photos of a carousel take the shape of the first one. Prepare them all at the same size, 1080 × 1350 for example, so none get cropped by surprise.
Quality and colours
- JPEG at 85–90. Instagram recompresses everything: starting from a clean, already sized file limits the damage.
- sRGB. It’s the colour space every screen reads in the same way. Bright colours from the iPhone (Display P3) may look different on other phones if left as they are.
- Don’t enlarge. If a photo is smaller than 1080 pixels, leave it as it is: stretching it only makes it blurry.
Stories and Reels: the safe zone
In 9:16 formats, the top and bottom of the screen are covered by the profile name, the buttons and the reply field. Keep text and important details away from the top and bottom 250 pixels or so.
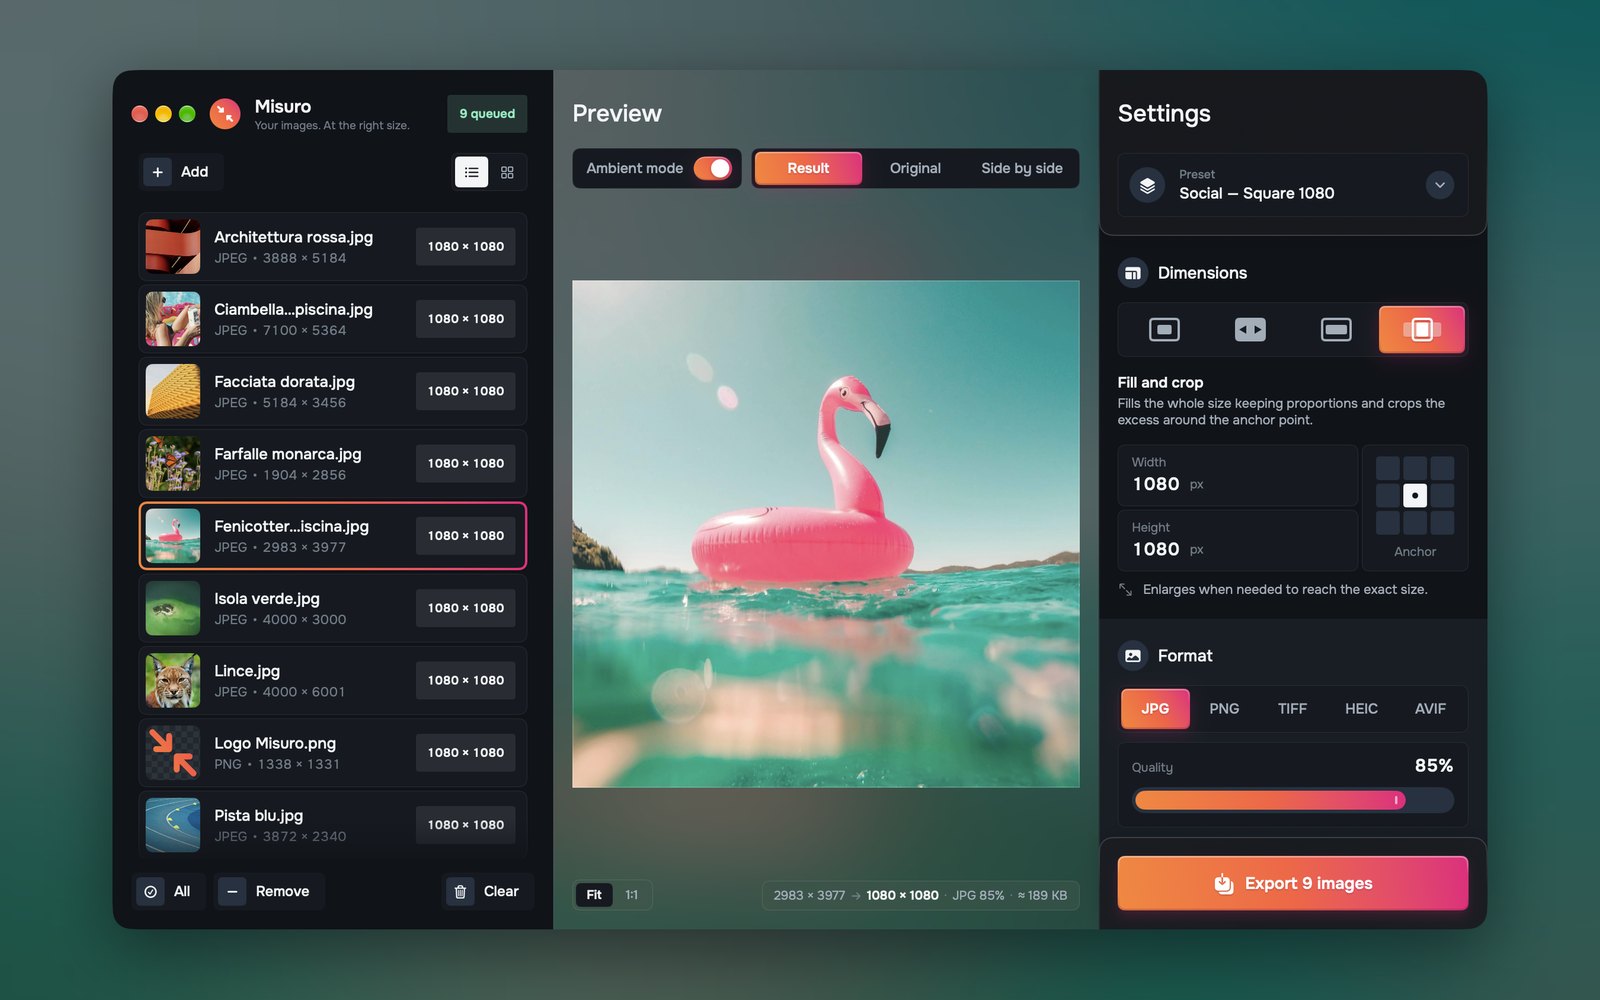
A whole shoot in one go, with Misuro
- Drop the photos into the window.
- Choose the Social — Portrait 1080 × 1350 or Social — Square 1080 preset: they use Fill and crop, which fills the frame edge to edge.
- Move the anchor point where the subject is, and check the result in the preview, photo by photo.
- If you want, add your signature as a text watermark, then export.
For Stories, set 1080 × 1920 with Fill and crop and save it as your own preset: next time it’s one click.

Misuro for Mac
Resize, crop and convert batches of photos, with presets, watermarks and metadata control. Offline, one-time purchase.

Read next
Photo credits
Cover photo: Azim Khan Ronnie on Unsplash.