Guides · How to
How to convert HEIC to JPG on a Mac, even hundreds of photos
iPhone photos are HEIC, and not everyone can open them. Three ways to turn them into JPEG, from a handful to whole folders.
Short answer. For a few photos, select them in the Finder and right-click › Quick Actions › Convert Image, then choose JPEG and Actual Size. For hundreds of photos, or to choose quality and colour profile, drop them into Misuro, leave width and height on Auto, choose JPG and export.
Since 2017 the iPhone saves photos in HEIC, Apple’s “high efficiency” format. On a Mac, iPhone and iPad they open everywhere. The trouble begins elsewhere: some websites, online forms, older programs and Windows computers without the right extension don’t accept them. The solution is to convert them to JPEG, which everyone can open.
Why HEIC exists
HEIC saves space. In our test on nine photos, at the same quality an HEIC weighed about 23% less than a JPEG. On a phone with thousands of photos, that’s many gigabytes. It also supports 10-bit colour and depth information. As a format for your own archive it’s excellent; it’s only less universal.
1. A few photos: the Finder
- Select the photos in the Finder.
- Right-click › Quick Actions › Convert Image.
- Choose JPEG as the format and Actual Size, so they are not reduced.
The JPEG copies appear next to the originals. You can’t choose the quality or the folder, but for a handful of photos it’s the fastest way.
2. From Preview or Photos
In Preview: open the photos, select them all in the sidebar and choose File › Export Selected Images, then pick JPEG. In Photos: select the photos and choose File › Export › Export Photos, with JPEG as the type and the quality you prefer.
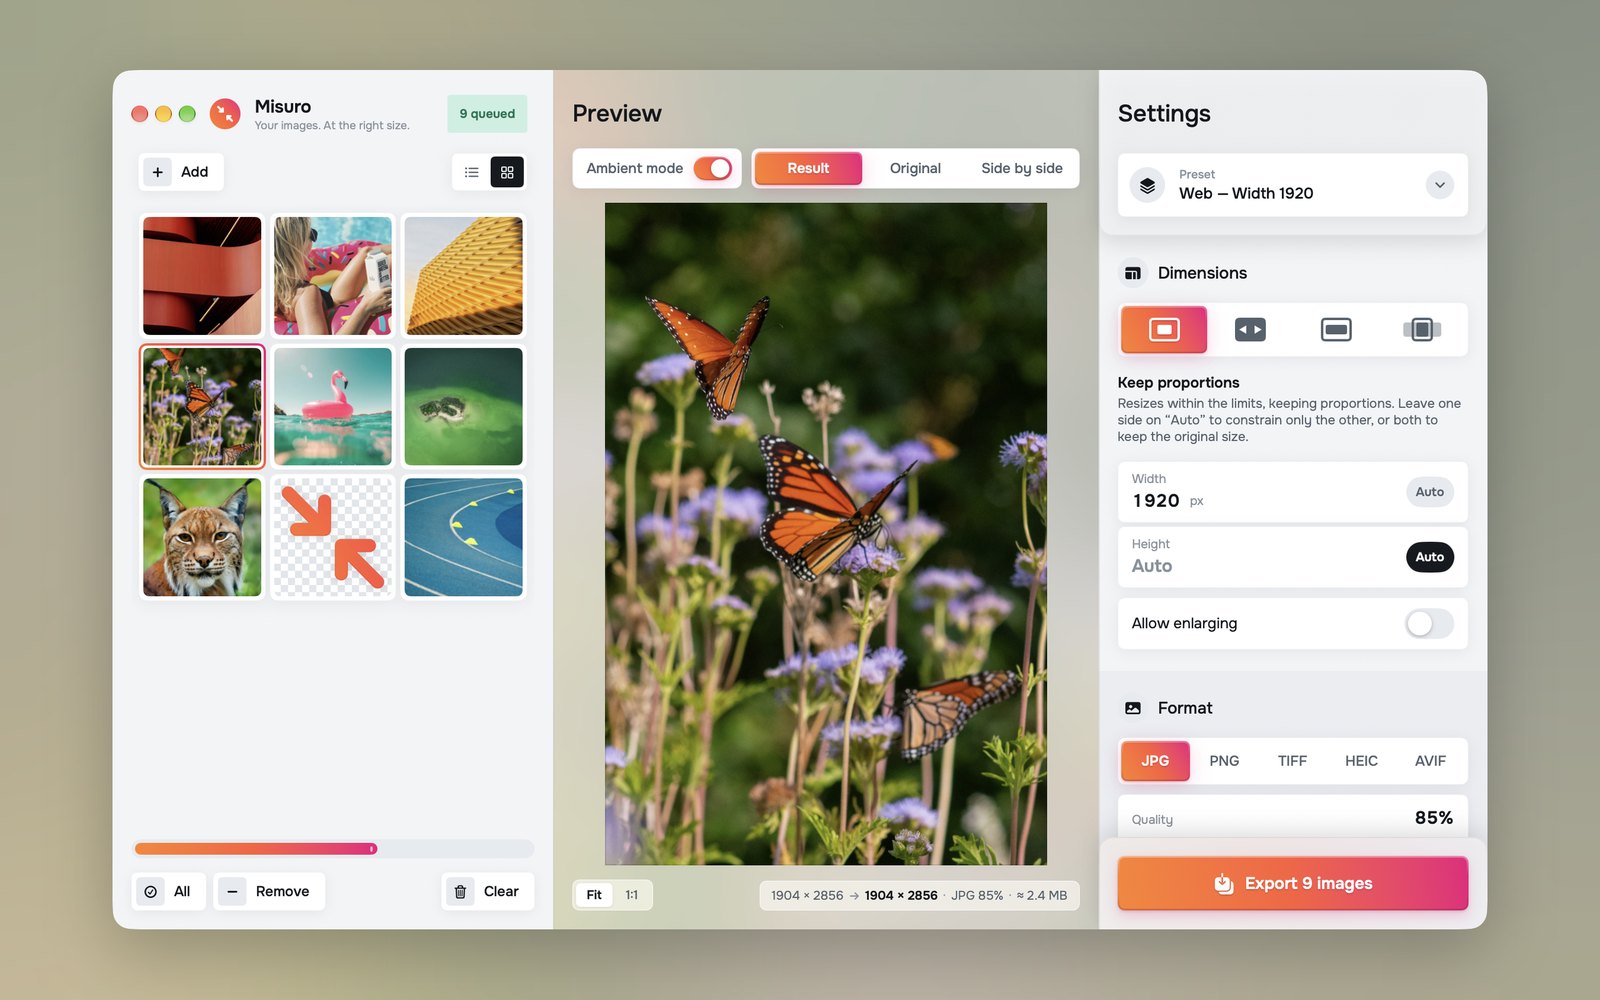
3. Hundreds of photos: Misuro
- Drop the photos or the whole folder into the window.
- Leave width and height on Auto: the photos keep their original size and only the format changes. Or choose a size if you also want to reduce them.
- Choose JPG and a quality between 85 and 90: indistinguishable from the original, much lighter than a maximum-quality JPEG.
- Export to a folder, or next to the originals.
Two details that matter
- Colours. iPhone photos use the wide Display P3 colour space. In Colour & Metadata, Original keeps it inside the JPEG, so colours don’t change; sRGB is the safest choice for the web and for older programs.
- HDR photos. Recent iPhones save some photos in HDR. JPEG has no room for it: Misuro converts them to normal brightness and tells you so in the export summary.
For conversions you do often, there are two shortcuts: in the menu bar icon choose JPG as the format and drop the photos on the icon; or select them in the Finder and use Quick Actions › Resize with Misuro.
Or take JPEGs from the start
On the iPhone, Settings › Camera › Formats › Most Compatible saves new photos as JPEG. Alternatively, Settings › Photos › Transfer to Mac or PC › Automatic converts them when you copy them to a computer with a cable. Both cost space or quality on the phone: converting only when needed is often the better choice.

Misuro for Mac
Resize, crop and convert batches of photos, with presets, watermarks and metadata control. Offline, one-time purchase.

Read next
Photo credits
Cover photo: Alexander Mils on Unsplash+.