Guides · Guide
How to reduce the file size of photos without losing quality
Most of the weight of a photo is invisible. Here is how to remove it, in order of what saves the most, with real numbers.
Short answer. Three things reduce weight, in this order: fewer pixels (a photo 2048 wide instead of 6000 weighs about a tenth), quality 75–85 instead of 100, and a more efficient format such as AVIF or HEIC. Together they take a 5–10 MB photo to a few hundred kilobytes, with no difference you can see.
“Without losing quality” is a promise worth checking. Every lossy format (JPEG, WebP, AVIF, HEIC) throws something away. The real goal is different: to lose only what nobody sees. The good news is that there is a lot of it, and that the biggest saving has nothing to do with compression.
1. Pixels: the biggest saving
A camera or a phone takes photos 4000–8000 pixels wide. A website, an email or a phone screen shows them much smaller. Weight grows with the area, so halving the width cuts the weight to about a quarter. Measured on nine photos as JPEG 80:
| Width | Average weight |
|---|---|
| 4096 px | 2.3 MB |
| 2880 px | 1.1 MB |
| 2048 px | 587 KB |
| 1440 px | 288 KB |
| 1080 px | 165 KB |
No compression setting comes close. Choose the size from where the photo will be shown: here is how many pixels you really need.
2. Quality: the sweet spot is 75–85
The quality slider is not linear. From 100 to 85 the file shrinks a lot and the image barely changes; below 70 the savings get smaller and the damage starts to show, first in skies and gradients. On our nine photos at 2048 pixels:
| JPEG quality | Average weight | Fidelity (SSIM) |
|---|---|---|
| 90 | 766 KB | 0.987 |
| 80 | 587 KB | 0.983 |
| 70 | 482 KB | 0.978 |
| 60 | 349 KB | 0.971 |
From 90 to 80 you save almost a quarter for a difference that is very hard to see. 80–85 is a safe choice for almost everything; 70–75 for thumbnails and email.
3. Format: the same quality in less space
At the same fidelity as a JPEG at 80, AVIF weighed about 25% less and HEIC about 23% less in our test. WebP saves little on photos but a lot on screenshots and graphics. JPEG stays the most compatible: use it when you don’t know where the image will end up.
Never PNG for photos. PNG doesn’t lose quality, so it can’t throw anything away: a photo in PNG weighed six times the JPEG on average. Keep it for screenshots, logos and transparency.
4. The small extras
- Metadata. Removing EXIF, thumbnails and maker notes saves a few tens of kilobytes per photo, and removes the GPS location too.
- Colour profile. sRGB is the right choice for the web: browsers expect it, and it avoids colour shifts.
- Don’t compress twice. Every time you open and save a JPEG, it loses a little more. Always start from the original.
How to check you haven’t lost anything
Look at the result at actual size, not zoomed out, next to the original. The first places where compression shows are skies, gradients, skin and fine text. If you can’t tell them apart at 100%, nobody will.
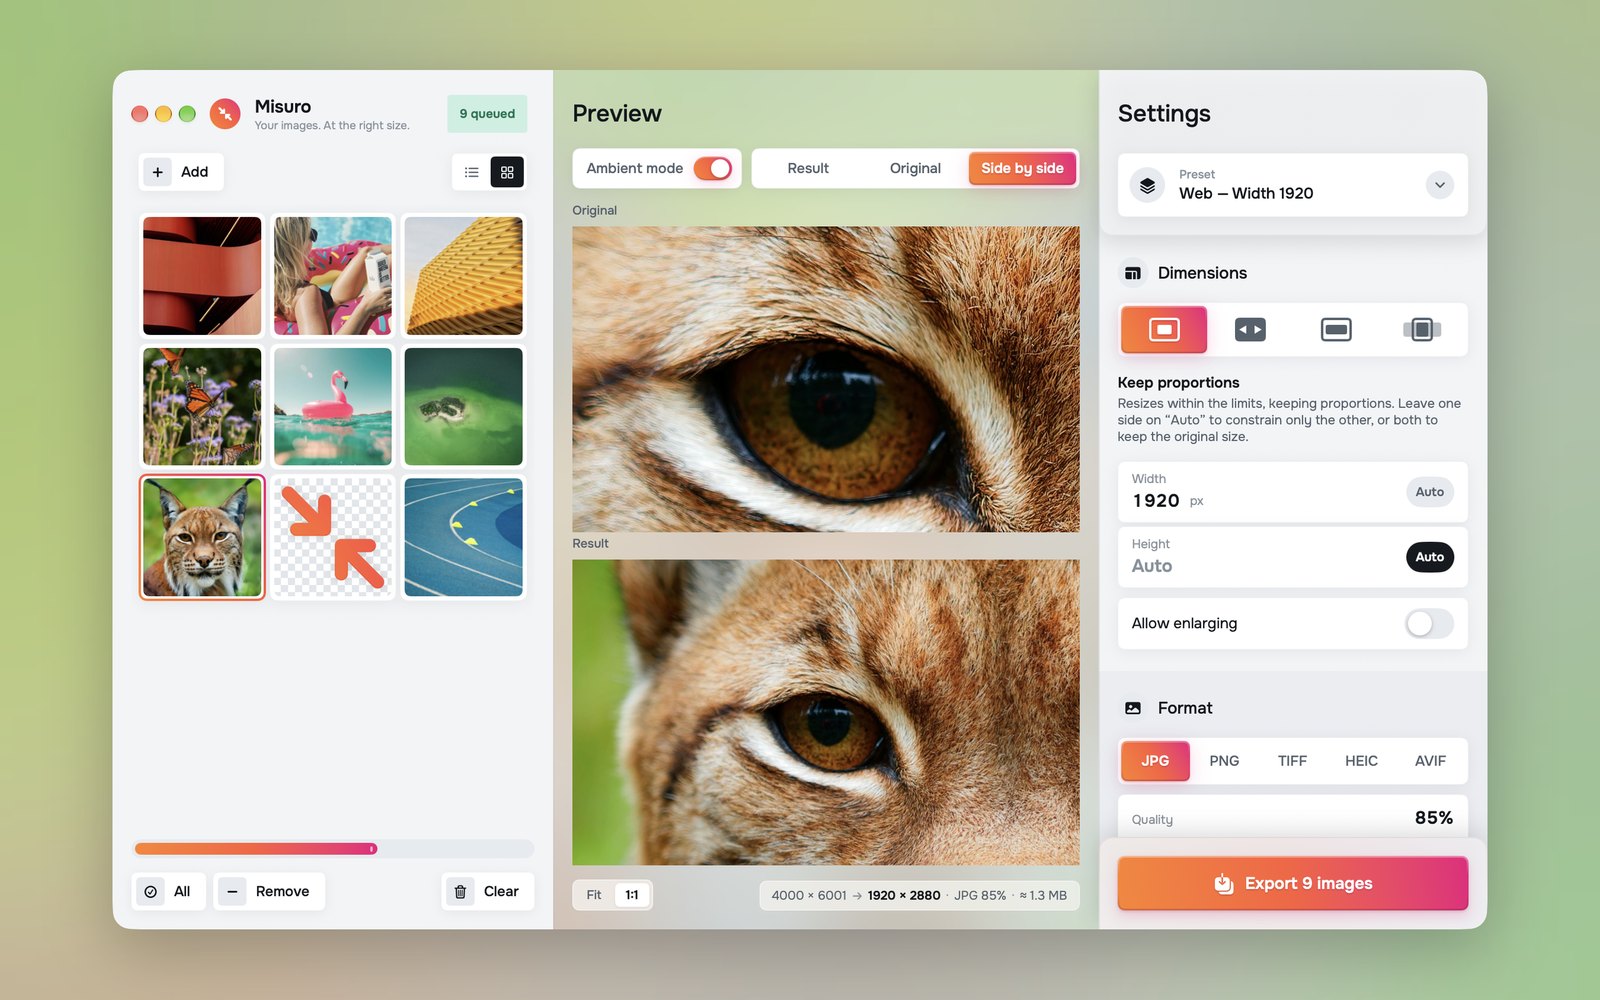
All of it at once, with Misuro
- Drop the photos into the window and choose the size, or a preset such as Web — Width 1920.
- Choose the format and move the quality: the preview shows the result already compressed, with the estimated weight underneath.
- Use Side by side at 1:1 to compare it with the original, pixel by pixel.
- In Colour & Metadata choose sRGB and remove the metadata you don’t need, then export.

Misuro for Mac
Resize, crop and convert batches of photos, with presets, watermarks and metadata control. Offline, one-time purchase.

Read next
Photo credits
Cover photo: Planet Volumes on Unsplash+. Test photos: Cristina Gottardi, Dan Otis, Denys Nevozhai, John Towner, Kristaps Ungurs, Laurine Bailly, Martin Adams, Michael Bourgault on Unsplash; Lisa Fotios on Pexels.